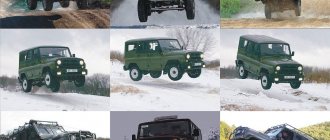
The vehicles to which the UAZ 469 belongs are designed to perform their functions in harsh conditions, difficult climatic zones, in forests, mountains, and in swampy areas without asphalt pavement. They work in the Far North, Siberia, taiga, and high mountain regions. To increase the cross-country ability of the UAZ 469, a traction axle is used at the front of the car. A vehicle with a 4x4 wheel arrangement effectively overcomes off-road areas where other vehicles cannot cope with their tasks.
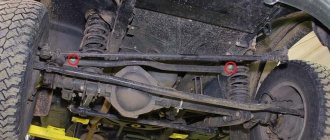
Front axle UAZ 469: design, diagram, repair
Photo 1: Front axle UAZ 469 (Source: Yandex.Pictures)
How to check the correctness of the work done
A basic check of the bridge's performance is carried out by measuring the crankcase temperature.
The car must be driven on a dry road for 25-30 km; an electronic thermometer is used to check the degree of heating. The plant allows the crankcase temperature to increase near the installation sites of the liner bearing supports to 90°C. Water can be used to roughly estimate the degree of heating: the liquid applied to the bridge body should not boil. At elevated temperatures, the axial clearance in the bearing supports is re-adjusted. During operation, increased noise, which occurs due to the gap between the gears and the displacement of the contact patch, is not allowed. During the grinding process of parts, the extraneous sound does not disappear, but only increases due to accelerated wear of gears and bearings. A knocking noise in the axle that occurs during sudden acceleration or release of gas indicates an excessive gap between the teeth. If extraneous sounds are detected, you need to return to the repair area and check the adjustment of the gaps in the main pair.
Main types of faults and their causes
Let's look at possible malfunctions that await the driver when operating the UAZ Patriot, related to the design of the bridge. As a rule, they are associated with excessive wear or operation in harsh conditions, or natural aging of metal components and can be expressed in the following symptoms:
- An increase in the noise level in the operation of the axle, which can be caused by the failure of the differential bearings, their incorrect adjustment, or an insufficient level of lubrication in the oil pan.
- The occurrence of knocking noises when the car starts moving is most often caused by wear of the satellite axle.
- The operation of the Patriot's front axle may increase noise during acceleration and/or braking. This is usually due to poor clearance of the main gear gears or poor engagement. Another reason for the phenomenon may be increased clearances of the bearings themselves.
- A decrease (loss) in oil level is detrimental for a number of reasons. Firstly, the bridge seal immediately loses its elasticity. Secondly, the bridge cover holds worse, and the seals of the internal hinges wear out.
- If noise is observed while cornering, then most likely we are talking about wear on the CV joints.
Main pair adjustment
After repairing the front axle associated with replacing gears, it is necessary to adjust the contact patch:
- Select a spacer ring (parts are produced with a tolerance of 0.025 mm in both directions) that provides the required clearance in the tapered bearings of the drive shaft. When selecting, the distance between the center of the axle shaft and the lower edge of the spacer sleeve (parameter A) is taken into account. It is also necessary to take into account the gap between the edge of the inner ring and the opposite edge of the outer ring (parameter B). The thickness of the ring is determined by the formula C=A-(111.96+B).
- Place the ring in the seat.
- Insert the outer bearing races of the drive shaft into the crankcase.
- Place the oil drain ring onto the drive shaft, and then mount the rear bearing.
- Install the spacer sleeve and insert the shank into the crankcase.
- Place the 2nd bearing on the drive shaft, the ring is mounted until it stops.
- Install the washer on the spline part, and then put on the flange (used to connect the driveshaft).
- Secure the ring and flange with a nut, tighten the threaded connection until the axial play is eliminated. The shaft rotation force should not be higher than 2.0 N*m if new bearing supports are used. If old bearings are used, the torque value is 0.4-0.8 N*m. The tightening torque of the nut should be in the range from 180 to 250 N*m; when increased force is applied, the spacer sleeve is compressed.
- Apply marks to the surface of the flange and nut (for example, with oil paint or nitro enamel), which are used for further adjustment of the bridge.
- To mount the differential in the crankcase cavity, you need to purchase several sets of adjusting washers that differ in thickness.
- Install the original washer (which was used with the old gears), and then open the structure with the nut, which is located on the right side.
- Apply oil paint or other coloring material that does not dry for 30-40 minutes to the gear teeth.
Turn the gears 3-4 turns and inspect the imprint that appears on the drive gear. If the spot has an oval configuration and is located in the central part of the teeth, then the adjustment is correct. The shift of the spot towards the top of the tooth indicates the need for the shank to move closer to the differential gear, but at the same time the driven wheel is moved away from the drive gear.
After the adjustment is completed, an oil seal is installed to prevent oil leakage. Then the shank bearings are tightened (until the paint marks align). To prevent spontaneous unscrewing of the threaded connection, the nut flange is jammed into a special groove provided on the side surface of the shaft.
Monitoring and scheduled maintenance
Experienced owners of UAZ Patriot SUVs pay special attention to regularly checking the condition of the oil seals. If replacement work is necessary, new oil seals must be lubricated with LITOL-24. The design of the front axle allows such repair work to be carried out as soon as necessary.
The design of the Spicer bridge, which is installed on UAZ Patriots, is quite simple in design. Thanks to this, you can carry out both maintenance and repairs yourself, having the basic tools in your arsenal. Long-term operation is always based on regularly scheduled maintenance.
Particular attention should be paid to monitoring the lubricant level in the axle gearbox and replacing it. If you have the slightest suspicion about the appearance of extraneous noise or other symptoms, you should follow the repair work sequences described here.
Video review of the front axle of the UAZ Patriot SUV:
Sources
- https://MyUazPatriot.ru/voprosy-i-otvety/gde-nahoditsya-i-kak-ustroen-perednij-most-na-uaz-patriot
- https://www.uazbuka.ru/most/front_axle_spicer.html
- https://krossovers.ru/vnedorozhniki/perednij-most-uaz-patriot-ustrojstvo-i-remont.html
- https://prohodimets.ru/transmissiya/uaz-patriot-shrus.html
Definition and purpose
The wheels of a car need a connecting beam that would support them and provide reliable support and fasteners. A bridge acts as such a beam. It takes on all the loads that arise during movement and absorbs them with elastic parts. If this device were not provided, the car would not cope with the tasks that it has to perform.
If the axle is a drive axle, then, in addition to its connecting function, it also acts as a torque transmitter. The drive axle is a complex device, a unit consisting of a mass of parts. Each of them carries out certain operational functions. Remove one part and the car will no longer be functional
This is why it is so important to regularly check the quality of all components of the car. The bridge structure includes the following elements:
- springs;
- axle shaft;
- differential;
- main couple.
Maintenance
Maintenance allows you to maintain the front drive axle of the vehicle in working condition. Thanks to maintenance, the wear rate of parts and components is reduced. It is important that when it is carried out, the occurrence of malfunctions is prevented; they are identified at an early stage for timely elimination.
Types of maintenance:
- daily – EO;
- first – TO-1;
- second – TO-2;
- seasonal – CO.
The frequency of maintenance-1 and maintenance-2 is regulated by GOST 21624-81.
| Operating Condition Categories | Maintenance frequency, km | |
| TO-1 | TO-2 | |
| I | 4000 | 16000 |
| II | 3600 | 14000 |
| III | 3200 | 12000 |
| IV | 2800 | 11200 |
| V | 2400 | 9600 |
Repair of bridges on UAZ 469
Many Internet users enter a similar request in Yandex or Google - “repair of the front axle of UAZ 469”. This means that they are interested in how to repair the front or rear axle on a UAZ themselves. Of course, the procedure for dismantling and repairing the bridge is described in special books on repair and operation, which are now not a problem to obtain. However, disassembling with your own hands both the front and rear axles down to the last screw is, to put it mildly, not an easy task. It may turn out that you just need to replace some small part, to access which you don’t have to disassemble everything.
Here are just some possible options for bridge failures on the UAZ 469 (Hunter, Patriot, “loaf”):
- The differential is worn out, the gear housing is bent
- Critical wear of the main gear in the gearbox
- Wear of the steering knuckle (ball joint, axle) on the front axle
- The appearance of large gaps in the pivot joints
- Bearing wear, resulting in the need for adjustment or replacement
- Injection of elements requiring lubrication
It can be difficult to understand which of the above happened to your car, however, it is often possible to roughly localize the problem even by ear. If you hear increased noise or a hum from the front or rear axle (even in neutral gear), the gearbox is most likely worn out (needs repair), or the bearings require lubrication. If your car “yaws” from side to side and the steering is fine, the problem may be stuck in the axle, CV joint, or incorrect installation of the pins that secure the ball joint, as a result of which play appears and the wheel begins to “walk.”
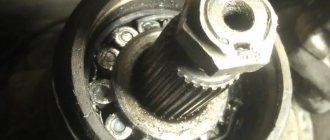
A very common malfunction is the flyout of the ball bearings that are located in the CV joint. They fly out precisely because of incorrect adjustment of the pins, as a result of which the geometric center of the CV joint and the axle do not coincide. As a result, the axle shaft “walks” in the seat and gradually breaks down. The CV joint itself is also damaged. And when turning, you can hear a crunching sound from the side of the wheel and the wheel may jam. During the repair process, some craftsmen simply throw out all the balls, except for the centering one (additionally welding it) - in order to get rid of the problem of their constant flying out.
Important Characteristics of the popular Soviet mining dump truck KrAZ-256B
But this does not save for long; there are even cases when the welded ball breaks off while driving, the loads there are so high. It is much more effective to adjust the king pins. It is necessary to achieve a condition in which the line passing through the king pins and the center of the axle shaft intersect at one point. And it is at this point that the center of the CV joint should be located. The displacement of the axle shaft from left to right, as shown in the figure, is unacceptable; it must be rigidly fixed; for this purpose, thrust rings and bushings are provided in the design.
Removing the Kingpin
Now let’s look at the process of removing the kingpin on a UAZ 469. For this procedure, you can use a special puller, however, it is quite possible to make it yourself. All you need for this is a plate with a hole for a bolt, a washer and 2 nuts. The plate will rest against other bolts around the perimeter, and the center bolt will just pull the king pin out of its seat.
The process of pressing out the kingpin
Main pair adjustment
The adjustment of the limit switch bearings is adjusted according to the instructions.
It must be adjusted from the moment it is started. We take a bent wire, put it on the flange and hang a 2kg load on it, but the flange does not move, so we add another 1kg, the flange begins to move.
Why this particular load, because the instructions for adjusting military bridges talk about exactly this weight. Moreover, the tail of the spicer and the military bridge are very similar. Military bridges on the UAZ are often used. UAZ military bridges are very reliable. The two cone bearings are practically the same in size. Moreover, a worn-in bearing is tightened twice as fast as a new one. If the flange is moving with a weight of 2kg, then it is necessary to tighten the nut a little. After this, we see that the moment of breaking is very difficult, and that’s how it should be. After adjusting the main pair, we assemble the differential and adjust the thermal gap. After this, tighten the differential nut. Then again, using our scales, weighing another 2 kg so that the total weight is 4 km, we will check the adjustment.
Regular work
Do-it-yourself repair of the front axle of UAZ Bukhanka and UAZ 469 is not difficult. Most often, during operation it is necessary to carry out various preventative maintenance. As a rule, they do not require removal and disassembly of the bridge. The list of care activities includes:
- The kingpins are checked for gaps;
- Threaded connections must be periodically tightened;
- The alignment is checked;
- The requirements of the parts lubrication tables are followed.
It is imperative to visually inspect the main components. Particular attention is paid to the serviceability of the fastening bolts. All locking elements must also be securely fastened. Check the maximum steering angle of the wheels. It should not exceed 28 degrees. If indicators differ from those indicated, adjustments must be made. Also always check that the kingpins are tightened and functioning correctly. Failure to correct minor faults in a timely manner may lead to the need for major repairs of the front axle.
Increasing the service life of the structure
There are several ways to increase the service life of the UAZ structure. The presence of a front axle in a vehicle imposes special requirements for operation. If you monitor and disable the hubs of the axle shafts and wheels at the right time, this will help increase the service life of the mechanism parts when the front-wheel drive is turned off. To prevent mechanical damage to drive components, turn on after the couplings. After switching from off-road to highway, you should immediately switch to rear-wheel drive. Another reason that contributes to rapid wear of rubber is constantly working clutches.
Machine maintenance must meet a number of requirements:
- Periodicity.
- Regular check of main components and mechanisms.
- Timely replacement of worn parts.
- Monitoring the level of oil and other liquids.
- Checking and adjusting wheel bearings.
- Monitoring the functionality of the main gear axial clearance components.
- Use of high-quality consumables and mixtures.
Regular maintenance, careful operation and following the manufacturer’s recommendations are the key to long and reliable operation of the vehicle.
Existing types of bridges
Improved bridges on UAZ
- Managed. This is usually a front axle of a car, equipped with either rear-wheel drive, which is outdated today, or all-wheel drive. But there is another option: in transport equipment for public utilities or agriculture, it is the rear axle that is steered, not the front axle. This type of design is divided into two subtypes.
- Uncut. This is a special support, equipped with a mechanism for steering knuckles, fixed at the edges; wheel hubs are placed on the knuckles. The purpose of this design is to control the rotation of the wheels while driving. The most important criteria are the lightness and strength of a continuous beam. That's why it is usually made of durable steel using forged technology.
- Split. This is already a gearbox equipped with drive shafts. The purpose of the cutting mechanism is to transmit torque to the wheels. The split bridge provides ample ability to maneuver the vehicle.
- Supportive. This design is used to increase the lifting power of the machine and plays the role of an additional supporting element. Without this part, a car designed to transport large cargo would simply fall apart within the first kilometer. A supporting device can be found in such a unique vehicle as a motor home.
- Continuous leader. This is a rather complex structure, consisting not only of a beam, but also axle shafts, bearings, and a differential. On the support of this structure, springs and fasteners are attached to secure the suspension. Thanks to the continuous drive axle, the drive wheels can spin at different speeds, in addition, the design softens the load and keeps the car under control when cornering. Some bridge parts undergo additional processing to give them greater strength and elasticity. So, the axle shafts are made of high-quality steel and then hardened with high-frequency heat.
Blog about UAZ
Adjustment of the gaps in the meshing of gears and in the bearings of the drive axle of UAZ-3741, UAZ-3962, UAZ-3909, UAZ-2206, UAZ-3303 cars is carried out only when replacing gears or bearings, or when axial clearance appears in the driving or driven gears of the main transfers. Replacement of main gears should only be done as a complete set.
Adjustment of the bearing of the drive gear of the main drive of the drive axle must be done by selecting the thickness of the shim pack and tightening the flange nut. The bearing must have such a preload that there is no axial movement of the drive gear and the gear can be rotated by hand without much effort.
Check the bearing preload with a dynamometer. At the same time, disconnect the left half of the crankcase. Remove the drive gear bearing cap so that cuff friction does not affect the dynamometer readings. With proper adjustment, at the moment of turning the drive gear by the hole in the flange, the dynamometer should show a force of 1.5-3 kgf for run-in bearings and 2.0-3.5 kgf for new bearings.
When replacing the cover, align the lubrication holes in the crankcase, gasket and cover. The tightening torque of the drive gear flange nut should be 17-21 kgcm. You cannot even unscrew the nut a little in order to ensure that the cotter pin hole matches the slot in the nut. If the nut is not tightened sufficiently, the inner rings of the bearing may rotate and, as a result, wear of the adjusting shims and the appearance of dangerous axial play.
If axial play of the drive gear appears during vehicle operation, tighten the flange nut. If the axial play is not eliminated, then reduce the thickness of the shim pack and adjust the bearing as indicated above.
After adjustment, monitor the heating of the bearings while driving. A slight heating of the bearing is not dangerous, but if the neck of the drive axle crankcase heats up to a temperature of 90 degrees or higher, the water on the crankcase boils, this means that the bearing has been overtightened and the overall thickness of the gaskets should be increased.
Adjustment of the differential bearings must be done by selecting the thickness of the package of adjusting shims installed between the ends of the inner rings of both bearings and the gearbox. When replacing main gears and differential bearings, make adjustments in the following sequence:
1. Press the inner rings of the differential bearings onto the journals of the assembled differential so that there is a gap of 3-3.5 mm between the ends of the gearbox and the ends of the inner rings of the bearings.
2. Remove the axle shafts and install the differential assembly with the driven gear into the crankcase, install the gasket and cover, tighten the cover mounting bolts and, turning the driven gear with a mounting blade through the neck of the crankcase, roll the bearings so that the rollers take the correct position. Then use fasteners to evenly and completely connect the cover to the crankcase.
3. Unscrew the fasteners again
Carefully remove the cover, remove the differential from the axle housing and use a feeler gauge to measure the gaps A and A1 between the ends of the gearbox and the ends of the inner rings of the bearings.
4. Select a package of gaskets with a thickness equal to the sum of gaps A+A1. To ensure preload in the bearings, add a 0.1 mm thick spacer to this package. The total thickness of the gasket package should be A+A1+0.1 mm.
5. Remove the inner rings of the differential bearings. Divide the selected pack of gaskets in half. Install the gaskets on the journals of the satellite gearbox and press the inner rings of the bearings until they stop. After this, adjust the side clearance by moving the driven gear.
When replacing only the differential bearings, measure and compare the height of the new and old bearing assemblies. If the new bearing is higher or lower than the old one by some amount, then reduce the thickness of the existing gasket package in the first case and increase in the second case by the same amount.
Important TOP 10 brands of gasoline and electric lawn mowers that are worth paying attention to
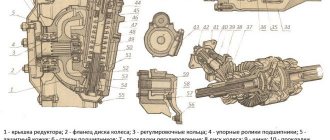
Description of components and construction diagram
The design of the front axle on the Patriot should begin with a description of the main elements and components. Among them:
- drive shaft and drive gear;
- driven gear with a large number of teeth;
- axle housing;
- roller type bearing;
- flange;
- nut for adjusting differential bearings.
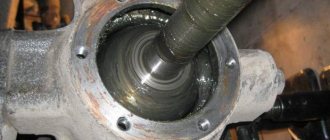
The diagram of the front axle of the UAZ Patriot, which can be found on numerous thematic forums, demonstrates the presence of a large number of small and large parts that directly affect the operation of the unit as a whole. The Spicer crankcase (this is the name of the described design) is a cast element into which axle shafts are pressed and closed with a lid. It houses the main gear and differential, which improves the performance of the unit.
To service it, simply remove the cover to gain access. This may be necessary when replacing bearings, monitoring the oil level, and adjusting backlash. Another feature of the Spicer front axle design is that it is equipped with a new type of CV joints, which are famous for their durability. They should be periodically lubricated, but not with traditional Litol, but with a special product called CV joint-4.
As for the difference in the design of the structures of each of the drive axles, there are no particular fundamental differences here either. At the front axle of the Spicer Patriot, force and torque are transmitted through the differential and final drive. The beam is hollow, and a pair of semi-axles are placed in it, which account for the rotation from the driven gear.
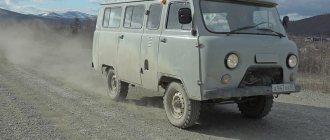
UAZ Patriot: car review
This SUV appeared on the sales scene at the beginning of the 2000s and is still a leader in the domestic market. The project modernization process has not yet been completed. The developers promise that in 2022 they will release an even more advanced version that will surprise you with a modern security system and richer equipment. But that’s later, what is there now? Let's explore in more detail.
So, we have before us a rather powerful SUV with impressive dimensions and a serious, rugged appearance. How different it is from everything that the plant produced in previous years! Previously, practicality was put at the forefront, there was no talk of any aesthetics.
Auto parameters
Now a lot has changed, the age of dullness and dullness is over, the modern consumer audience demanded new ideas, creativity, and bold design solutions. Russian masters had to work hard to present a competitive project. Thus, in long creative searches and painstaking work, the pride of the Ulyanovsk plant was born - the UAZ Patriot.
The car still feels classic restraint, but here it has acquired a different design. Patriot can be compared to jeeps, every detail speaks of confidence and power, every element attracts the eye. This car is bright and memorable.
The salon is quite roomy and well decorated. Everything is normal, all devices are at hand, there are no special complaints. Of course, if you compare the car with its Western counterparts, you can note an imperfect ride, simple upholstery, knocking in the cardan when you hit a bump, and some other points.
But if you do not take on the role of a scrupulous critic, but evaluate it objectively, then the conclusion will be as follows. A worthy project from a worthy plant, a car that will not let you down on the difficult roads of our vast homeland and, with proper care, will serve its owner for decades.
The body length of the Patriot is 4647 mm, width - 1828 mm, height - 1900 mm, curb weight is 2170 kg. Under the hood is a 2.7-liter gasoline engine with a power of 128 hp. s, developing a maximum speed of 150 km/h. The engine takes AI-92 gasoline, burns 12.5 liters of fuel per 100 km in city mode, and 9.5 liters on the highway. The power unit works with all-wheel drive and a five-speed manual transmission.
Main characteristics of the car
A short summary. The car is reliable, practical, stable, and has good handling. If you put a little work into it and work on tuning, it can conquer vast horizons.
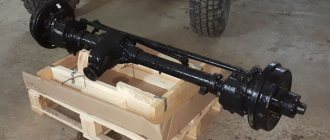
Parsing
When carrying out repairs, it is necessary to place the unit on a stand. This will make the disassembly task easier. After this, remove the wheels. Next, proceed to disassembly:
- Dismantle the bipod. The nut securing the rod pin and the steering knuckle lever is twisted;
- Next, unscrew the bolts securing the brake drums. At the same time, remove the couplings used to disengage the wheels;
- Proceed to disassembling the hub. This work begins by straightening the edges of the locking washers. Next, the nut with the locknut is twisted, this allows you to remove the washer immediately with the inner ring and roller bearings of the hub. Then the rest of the hub is removed (see the article “How to remove the front wheel hub”);
- Remove the brake shield, this is done by unscrewing the bolts. The trunnions with the knuckle joints should be removed;
- The steering linkage rod is disassembled; to do this, you will need to unscrew the trapezoid mounting nuts;
- To remove the ball joint, unscrew the bolts securing it to the axle shaft. Remove the limiting supports. The supports are pressed out;
- Remove the shims used for adjustment from the knuckle and lever. Next, unscrew the nuts securing the upper lining of the king pin. The same goes for the bottom. Remove the ball joint seal. Afterwards the pins are pressed out. Disassembly is complete.
Repair
. After disassembly, all spare parts are washed in gasoline and lubricated. Defective ones are replaced with new ones. Assembly occurs exactly the opposite, and some nuances of the process need to be clarified.
When replacing the pivot bushings specifically in the ball joint, you need to tighten them to 25 mm after pressing. It is necessary to put lubricant inside. Repairing the front axle of a UAZ Bukhanka and UAZ 469 with your own hands is not that difficult, but you need to be careful. For example, when installing a ball seal, the ring for it must be soaked in hot oil. After assembly, the operability of the bridge is checked using a stand.
How to check the correct adjustment of the UAZ Patriot axle.
To check the correct adjustment of the UAZ Patriot axle, it is not at all necessary to know how to adjust it. Before you do anything, check the temperature of the axle after driving fast. If the bridge gets very hot, then we can definitely say that it, at a minimum, needs to be adjusted. If such a bridge is not repaired, then sooner or later it will jam. 1. Unscrew the cardan from the bridge. With the car raised, rotating the axle flange (the universal joint mounting point) by hand in both directions, you can feel the presence of broken teeth, assess the condition of the bearings and other problems. 2. After removing the bridge cover, check the condition of the teeth on the main gear and differential by rotating the bridge. There should be no cracks, wear, roughness in the contact patch, cuts or torn teeth. Assess the location of the contact patch. In the crankcase you can sometimes find the remains of destroyed adjusting rings and broken elements. The problems listed above actually exist. If everything is intact, then the bridge can be adjusted. If there are problems, then... 3. Check for transverse clearances in the bearings. If there are gaps, then the bridge must be adjusted before it jams. 4. Check that the final drive is properly engaged. To do this, paint the teeth of the main gear with paint from an aerosol can and, turning the bridge in both directions, determine the pattern of engagement marks. The following figure shows the correct location of the contact patch on the teeth of the final drive gears of the UAZ Patriot axle.
The following photo shows an example of incorrect adjustment of the main pair and the presence of roughness at the contact points:
After adjusting the rear axle, there should be no axial play in the bearings of the main gear drive gear and in the bearings of the final drive differential. The axial clearance in the bearings of the bridge is the main reason for its noise and jamming due to the destruction of the teeth in the main pair. There are very few craftsmen who know how to correctly adjust the main pair of the bridge. Instructions on the Internet are not very helpful, since the process is iterative, requiring not only ability, but also experience. We specialize in drive axle alignment. People come to us from other cities on the recommendations of our clients to rebuild drive axles and gearboxes, including foreign cars. Drive axles, aluminum and UAZ tuning are our competitive advantage.
Change of oil
The UAZ Patriot transmission should be filled with the highest quality oil that you can afford.
Too little quality can leak through low-quality seals. Very often, in the rear axle, over time, due to moisture getting into it, the oil turns into a thick, non-flowing liquid. Simply changing the oil in such a bridge does not have the desired effect. If you are not sure, remove the axle and axle cover and clean the axle. Do not have any illusions - if the breathers are not removed, if you drove on water, if a lot of time has passed, etc., then there is no longer oil in the bridge. Moreover, the slurry is not in the gearbox, but closer to the hubs. Those. The rear axle wheel bearings are practically not lubricated.
Breathers. Exiting breathers into the engine compartment
We recommend that absolutely everyone do this modification, especially since the costs for it are relatively small.
Breathers on bridges must be brought into the engine compartment so that water does not get into the bridge under any circumstances. For this purpose, brake hoses and brake pipes are usually used. It is easier to use oil resistant hoses.
At the end of the tubes under the hood, a plastic fine fuel filter from the classics is installed so that dust does not get into the bridge. In this case, the end of the tube is bent down so that water does not get into the bridge even if the car goes into more water than the location of the end of the tubes.
Important The principle of operation and the difference between a crane beam and a hoist
On cars with a compressor, during extreme operation, they sometimes create excess air pressure in the transmission - as if they inflate the axles, gearbox and transfer case from the inside. This completely prevents water and dirt from getting inside and well lubricates the oil seals in areas of friction.
Sometimes an expansion tank with a balloon is installed at the end of the tube to create volume. In this case, the connection between the internal space of the bridge and the atmosphere is completely closed. As the volume of air in the bridge changes during heating and cooling, the balloon inflates or contracts.
If you have driven through a ford with a depth of more than 30 cm, then you should immediately (on the same day) change the oil in the transmission - these are the manufacturer’s instructions. Draw conclusions.
Determining the malfunction
CV joints are also popularly called “grenades”, which actually comes from the type of product. A CV joint malfunction can be caused by many reasons, which we will consider below:
- The main reason for the failure of the “grenade” is damage to the boot, which ultimately entails the penetration of aggressive environments into the working element of the product.
- If the part was made from low-quality materials, but this phenomenon is extremely rare.
- Aggressive handling of the car while driving.
- Lack of lubricants.
Thus, based on these reasons, the “grenade” malfunctions, which requires its immediate replacement. A CV joint is a kind of hinged product, the structure of which contains parts that work in close contact and under constant loads. As a result, any of the above factors leads to CV joint failure. It is not difficult to determine a CV joint failure. A characteristic sign of a malfunction of this product on the UAZ Patriot SUV is a crunching sound. This characteristic crunching sound comes from the balls moving along the groove due to the high degree of production.
A characteristic sound from under the wheels is heard at the moment of making a turn, during sudden accelerations and overcoming obstacles. But this is not the only sign by which you can be sure that the CV joint is faulty. To dispel doubts and make sure that the CV joint is faulty, you should resort to the following types of checks:
- when the UAZ Patriot car starts moving, constant signs of jerking movements are observed;
- the presence of free play of the CV joint shaft when trying to move it in different positions.
We recommend: TOP 10 best xenon lamps: rating of models + recommendations on which xenon is better to install
If such types of faulty operation of a UAZ Patriot car are detected, the car owner must immediately carry out repairs, or, more precisely, if there is the slightest disruption in the functioning of the “grenade”, it will need to be replaced. We’ll look at how to replace a grenade on a UAZ Patriot later.
CV joint replacement
So, let's consider the process of replacing an important part of the front axle - the “grenade” or CV joint. Let us present the main stages of preparation, dismantling and installation of a new part on a UAZ Patriot SUV.
It is worth noting right away that replacing a CV joint is not an easy task, but any driver can handle it if he devotes a little time and attention to his car. Of course, the technicians at the service station will replace it in a matter of hours, but you will have to pay a considerable amount. But are such problems worth the big costs? Only in case of great hurry!
Important! Before starting to consider the process, it should be noted that “grenades need to be changed in pairs, even if only one CV joint has failed, then in the process of replacing it you need to install a new one on the other side.
So, replacing the main part of the UAZ Patriot front axle is carried out in three stages.
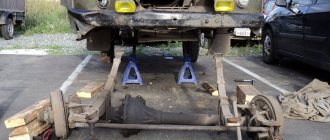
Stage No. 1 – preparation
The UAZ Patriot vehicle must be placed in an inspection hole and the parking brake must be turned on. For greater safety, shoes are placed under the wheels of the car to protect the car from unauthorized movement. Having taken a standard set of tools, you can go down into the pit and begin the process of dismantling the front axle element. Let's give an example of how to replace the left CV joint on a UAZ Patriot, and for the right one the replacement process will be similar.
Stage No. 2 - dismantling
- Initially, the car wheel is removed. You can remove both wheels at once for ease of work. Everyone knows how to remove a wheel, so there is no point in dwelling on this event. Be sure to install supports under the vehicle body for added safety.
- The brake disc is removed together with the ABS anti-lock braking system sensor.
- Continuing the removal of the front axle CV joint, you need to unscrew the bolts securing the axle to the steering knuckle block.
- Now you need to dismantle the axle together with the hub and coupling.
- We proceed to dismantling the axle shafts and hinge.
- The right CV joint is dismantled in the same way as the left one. It is important to take into account that during installation, do not confuse the parts removed from the right and left sides. Now you need to remove the “grenade” by applying force. A hammer and chisel will come in handy for this task.
It is important to strike correctly, as a result of which the “grenade” will disengage with the axle.
Replacement of this element of the front axle is carried out in case of complete wear of the old part. We will look at how a CV joint is repaired in other materials, but now it remains to figure out how to install a new “grenade”.
Stage No. 3 – installation
Before installing a new front axle product, fill the CV joint to the top with lubricant (it is recommended to use CV joint grease-4 or Litol-24).
It should be remembered that the right drive shaft is longer than the left one.
- A plastic plug is mounted on the end of the shaft.
- To equalize the air pressure inside the cover, use a screwdriver to press out its edge.
- Do not forget also about the size from the end of the CV joint toe to the small edge, which should be 210 mm.
- At the end of the work, you need to tighten the clamps well.
Thus, the left CV joint of the front axle of the UAZ Patriot is mounted. After carrying out the work for the first time, it will be easier for the driver to do this all subsequent times. The approximate service life of a CV joint is 60-100 thousand kilometers, but proper operation of the product also plays an important role in this.
Based on this material, you can completely freely replace the “grenades” of the front suspension of the UAZ Patriot.
Adjustment
Before you start adjusting, prepare everything you need: bushings for the axle (if there is a groove on the axle), 4 thrust bushings, as well as oil seals. The main condition for adjustment is that the two halves of the CV joint do not dangle, both during straight-line movement and when turning! The procedure is as follows:
- Take the ball joint and press the bushing into it so that half of the CV joint does not hang out in the ball joint.
- There is a thrust washer on top; be sure to install a new one, even if the old one appears to be in good condition.
- Take a metal shaft (you can make it from a valve, for example) with cones on both sides and put a washer on it with a diameter similar to the central ball, that is, 27 mm. Place one edge against the center of the kingpin. Ideally, the second edge should also be in the center of the kingpin. If this is not the case, place the adjusting washers in the same place where the thrust washers are, or rather, under it.
Adjustment
It is necessary to try on the steering knuckle body over the ball joint and make sure that the center of the large hole in the steering knuckle coincides with the center of the support. If it is shifted by at least 3 mm, the CV joint cannot be assembled, since there is already a bushing there. And to adjust in the center, place a certain number of adjusting washers under the left or right kingpin, depending on which direction and how many mm you need to move the central axis. The kingpin must be tightened so that by hand you can turn the ball joint back and forth. If the seat for the king pin is broken and the king pin rotates together with the ball, grind off a few millimeters on the king pin and install it through the bushing. Rotation or play is unacceptable, since they lead to rapid wear of both the kingpin and the seat under it. It is better to replace the bushing in the axle itself (both front and rear). If necessary, adjust the size using a reamer. It is important to note that each half of the CV joint needs to be done differently. There shouldn’t be any play, but if half of the CV joint is too tight, then it’s better to remove it with a larger reamer. It is extremely important that the bushings are in place as shown in the image. If you place the bushing on only one side, then when the wheel turns, most of the load will fall on it, as a result - rapid wear, the appearance of play, and then the CV joint needs to be replaced.
Bronze bushings should be located in these places
During the assembly process after repair, it is necessary to lubricate all the bolts with nigrol so that next time everything can be easily unscrewed. All mating surfaces (the junction of the axle and the steering knuckle housing) must be cleaned of dirt. It is not recommended to lubricate the CV joint with grease, as it is thick. When heated under the influence of centrifugal force, all the solid oil will be scattered over the walls of the ball joint, and it is necessary that the CV joint balls be generously lubricated. To do this, it is recommended to dilute the solid oil by half with nigrol.
After final assembly and repair, one more important adjustment needs to be made. We are talking about an adjusting rotary bolt. This is the bolt that limits the maximum steering angle of the wheel.
It is important not to overdo it; do not tighten the bolt all the way - otherwise the wheel will jam. Tighten almost to the end, and then try to rotate the wheel (more precisely, the shaft on which it will stand)
It is necessary to unscrew the bolt back until the wheel stops wedging. The rotation angle should be no lower than the factory one. Well, now you yourself can repair the front axle on the 469 UAZ!
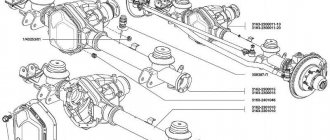
UAZ is a common car on Russian roads. Its design features allow you to move without problems on paved areas, as well as off-road. Repairing the front axle of a UAZ is impossible without knowing the diagram of the wheel gearbox, the design of which is similar to a similar part of the rear axle. The key difference is the peculiarity of fastening and installation of the main gear, the design parameters of the ball bearing located in a special compartment-cup.
Main design problems
It is better to install reinforced axle shafts on UAZ axles
The bridge is a complex structure, the failure of which causes the entire vehicle system to fail. Main malfunctions of the rear and front axles.
- Defective teeth of the main pair.
- Axle shaft defect.
- Oil leak.
- Bearing defect.
- Washer wear.
For what reasons do these malfunctions occur? If the car is equipped with rear-wheel drive and the front axle is connected here, then wild rides on bumpy roads will lead to catastrophic consequences. The transmission fails first, followed by everything else. If you often use gear oil without taking into account the season, then do not expect good performance from your car.
UAZ car
452d but there is no difference on which
UAZ the bridge is turned on,
everywhere it’s the same on 469, on loaves and the head.
If axial gaps occur in the bearings, all sorts of failures occur, so it is very important to periodically inspect all parts of the car to identify problems. If the tire pressure changes frequently, then their long operation will lead to the destruction of parts
Defects in the shaft, crosspieces and suspension bearings also lead to problems.
The main cause of most problems is wear of components or their poor quality. Strong overloads will not have a positive effect on the operation of the parts; still, take care of your car. Insufficient lubricant for parts is another cause of malfunctions. Incorrect adjustment of the front axle bearings will also lead to unpleasant consequences.
Axles from MTZ significantly increase wheel clearance
Tuning is a good thing, but only if it is carried out by real professionals. But quite often, unscrupulous specialists make gross mistakes, as a result of which the stroke and dimensions of the driveshaft completely do not coincide with the required parameters. The result is a serious breakdown and the need for almost major repairs.
Symptoms of structural failure.
- The front axle on the UAZ, like the rear axle, begins to emit a characteristic sound.
- At first the car is almost imperceptible, and then it begins to lose control more and more.
- The driver notices that fuel consumption is higher than before.
- Engine and transmission parts wear out quite quickly.
- Wedge while moving. Note that this is the worst of the symptoms. This means that there is a gap between the bearings, which can lead to serious problems. The wedge is accompanied by noise and crackling. In this case, urgent repairs are necessary.
To prevent malfunctions, timely adjustment of the UAZ rear axle, and the front one too, is necessary.
How to turn on the front axle on a UAZ
Engaging the front gear may be necessary if it is necessary to turn from an asphalt road surface onto a country road or terrain with potholes and mud. In the new conditions, rear-wheel drive will not cope with difficulties. Engaged front-wheel drive is a means of solving the problem.
- Stop the car and check the operation of the front wheel quick release clutch. It is turned on by turning the wheels clockwise until they stop.
- Move the rightmost lever forward to switch the front wheels to driving status. Now their rotation will be equivalent to the rear.
If the road condition worsens while driving, it becomes more and more difficult to continue driving, the engine stalls, you need to stop the vehicle and engage a lower gear. To do this, you will need to move the middle lever back. In low gear, all 4 speeds are available, and driving becomes easy and smooth again.
After overcoming off-road conditions, it is immediately better to put the middle lever in its original position and move the transfer gearbox to a higher level. On the highway, it is recommended to stop the front-wheel drive and quick-release clutches to save 2 liters of fuel. The measures help reduce noise levels while driving.
When is the right time to engage front wheel drive?
In order for the front axle to work, it must be turned on in time. First, let's figure out when to turn it on. When driving on an asphalt road, there is no need to engage all-wheel drive, since no one needs increased fuel consumption. It’s another matter when an SUV moves off-road, here, in fact, you can’t do without all-wheel drive
But it is important to know that in order to engage the front axle, if you have mechanical hub clutches, you need to get out of the car and move the regulator on the hub to the all-wheel drive position
If you have automatic clutches or hubs, there is no need to get out of the car and turn them on, but to do this you need to turn on the front axle using a button (lever) before driving off-road or fording. After the hub switches to 4x4 or four-wheel drive, you can upshift or downshift the transfer case.
Reasons why the drive does not turn on
Patriot car owners often have questions when the front axle drive does not engage when slipping in a rut. The cause of the malfunction is that drivers do not fully understand the principle of engaging all-wheel drive. In order to connect the axle, it is not enough to move the coupling to the required position; for this you still need to drive a few meters so that the wheels engage with the differential
Therefore, it is very important to move the hub to the 4 by 4 position even before entering an impassable swamp. If the SUV has already driven into the mud and is slipping, then engaging the front-wheel drive is useless, since it simply will not work
If a situation arises when the all-wheel drive was turned on, but the axle does not work, then diagnostic studies of the main unit are required. The principle of such a diagnostic study is to perform the following procedures:
- First, let's turn on the hubs on wheels.
- Suspend the front of the car until the wheels are off the ground.
- After this, you need to turn the cardan connecting the front axle to the transfer case.
- If the front wheels do not rotate when performing this procedure, then the fault must be looked for in the axle itself. But if the wheels rotate when the cardan is turned, then the fault should be looked for in the transfer case itself.
But these are not all the reasons for the malfunction of the front axle on the UAZ Patriot SUV. The bridge may not turn on due to failure of the hub itself as a result of wear of the splines. The design of the hubs has small splines, with the help of which the device is engaged with the internal bushing, which is put on the axle shaft. As a result of abrasion or breakage of the splines, the transmission of torque to the wheel hub is impossible.
If the gear shift mechanism in the transfer case is faulty, then the consequence of such a breakdown will be the inability to engage the front axle on the UAZ Patriot SUV. The cause of transfer case malfunction is wear on the gear teeth. A deformed high- or low-mode fork is also a consequence of the inoperability of the all-wheel drive and front axle.
If, when the front axle is turned on, it randomly turns off, then the consequence of this situation is wear of the bearings. These are bearings that are located directly in the shafts of the transfer mechanism. In this case, there is a distortion of the shafts and the inability of their normal functioning. But if it is discovered that the bearings are not worn out, then the reason for the unauthorized shutdown of the drive may be hidden in the wear of the latch or spring, through which the operation and activation of the transfer case is ensured.
To summarize, it should be noted that before overcoming a ford or other types of obstacles, you need to make sure that the all-wheel drive is working properly. Otherwise, the SUV will have to be towed.
Regular work
Do-it-yourself repair of the front axle of UAZ Bukhanka and UAZ 469 is not difficult. Most often, during operation it is necessary to carry out various preventative maintenance. As a rule, they do not require removal and disassembly of the bridge. The list of care activities includes:
- The kingpins are checked for gaps;
- The alignment is checked;
Threaded connections must be periodically tightened;
It is imperative to visually inspect the main components. Particular attention is paid to the serviceability of the fastening bolts. All locking elements must also be securely fastened. Check the maximum steering angle of the wheels. It should not exceed 28 degrees. If indicators differ from those indicated, adjustments must be made. Also always check that the kingpins are tightened and functioning correctly. Failure to correct minor faults in a timely manner may lead to the need for major repairs of the front axle.